Audio Basics: How a DI Box Works and Why You Need One
Have you ever wondered why some live performances sound crystal clear while others seem muddled and unprofessional? The secret often lies in something most people have never heard of: the DI box. Whether you’re setting up your first home studio, playing at a local venue, or working as a sound engineer, understanding how a DI box works can transform your audio quality dramatically. Let me walk you through this essential piece of audio equipment that bridges the gap between your instruments and your mixing console.
Understanding the Basics: What Is a DI Box?
Think of a DI box as a translator. Just like a translator converts one language into another so people can understand each other, a DI box converts one type of audio signal into another. DI stands for “Direct Injection” or “Direct Input,” and this little box does exactly what its name suggests—it allows you to inject your audio signal directly into a mixing console or recording interface.
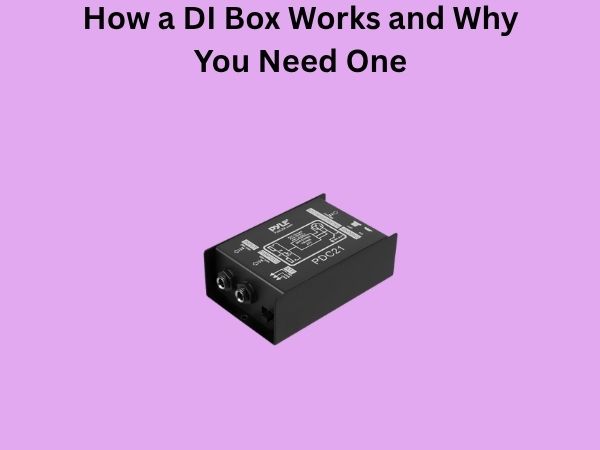
A DI box is typically a small, rectangular device that sits on stage or in your studio. It has connectors on one side that accept your instrument’s cable, and connectors on the other side that send the signal to your mixer or interface. But there’s much more happening inside this seemingly simple box than you might think.
The Problem DI Boxes Solve
Why Can’t You Just Plug Everything Directly In?
You might be asking yourself: why do we even need a DI box? Why not just run cables directly from your instrument to the mixer? The answer involves understanding the different types of audio signals that exist in the professional audio world.
There are two main categories of audio signals: balanced and unbalanced. Your typical guitar, keyboard, or audio interface outputs an unbalanced signal through a 1/4-inch jack. Meanwhile, most professional mixing consoles expect balanced signals through XLR connectors. It’s like trying to fit a square peg into a round hole—technically possible sometimes, but rarely with good results.
Signal Level Mismatches
Beyond connector types, there’s another critical issue: impedance and signal levels. Your instrument likely outputs what’s called a “line level” signal with specific impedance characteristics. Your mixer’s microphone input, on the other hand, expects something quite different. When you connect incompatible signals, you get problems like noise, distortion, or a weak signal that forces you to crank the gain knob dangerously high.
This is where the DI box becomes invaluable. It’s designed to handle these mismatches gracefully, ensuring your signal arrives at the mixer in perfect condition.
How a DI Box Works: The Technical Journey
The Input Stage
When you plug your instrument cable into a DI box, the audio signal enters what’s called the input stage. This stage is engineered to accept high-impedance, unbalanced signals—exactly what your guitar, keyboard, or audio interface produces. The input is typically a 1/4-inch jack, sometimes accompanied by an XLR connector for microphones if it’s a multi-input DI box.
Think of this stage as the friendly greeter at a restaurant—it welcomes your signal and prepares it for what’s coming next.
The Transformer: The Heart of the DI Box
Here’s where the magic really happens. Inside most quality DI boxes lives a transformer—a small but mighty component that performs several crucial functions simultaneously. This transformer is the beating heart of the device, handling multiple tasks at once:
- Impedance Conversion: It transforms the high-impedance signal from your instrument into a low-impedance signal that professional equipment prefers
- Signal Balancing: It converts your unbalanced signal into a balanced signal, which is far more resistant to interference and noise
- Level Adjustment: It optimizes the voltage of the signal to match what the mixer’s microphone preamp expects
This transformer has been the gold standard in professional audio for decades. Some modern DI boxes use electronic circuits instead, but the best units still rely on transformer-based designs because they deliver superior sound quality and reliability.
The Output Stage
After the transformer does its work, the signal exits through the output stage. This stage features a balanced XLR connection—the industry standard for professional audio equipment. The XLR connector carries three pins: the hot signal, the cold signal (which is an inverted copy of the hot signal), and the ground. This balanced configuration is why your signal arrives at the mixer noise-free, even when running through long cables in a noisy environment.
Active vs. Passive DI Boxes: What’s the Difference?
Passive DI Boxes: The Simple Approach
Passive DI boxes rely entirely on transformers to do the conversion work. They require no power source—no batteries, no phantom power. Just plug in your instrument and connect the output to your mixer. This simplicity makes passive DI boxes incredibly reliable. They’re also often more affordable and require no maintenance.
However, passive boxes have a limitation: they can sometimes introduce a slight loss of high-frequency content, particularly with longer cable runs. For most applications, especially in live sound situations, this is a non-issue.
Active DI Boxes: The Powered Option
Active DI boxes include electronic amplification circuitry in addition to the transformer. They’re powered either by batteries or by phantom power from the mixer (a 48-volt signal sent through the XLR cable). This active circuitry allows them to more aggressively condition the signal, offering some advantages:
- Better High-Frequency Response: Active boxes preserve more of the signal’s natural character across the frequency spectrum
- Broader Compatibility: They handle difficult source materials more gracefully, including very hot signals from synthesizers or outputs from mixing consoles
- Padding Feature: Many active boxes include a pad switch that reduces the input level by 20dB, allowing them to tame extremely hot signals
The trade-off is that active DI boxes cost more, require power management, and introduce slightly more electronic components that could potentially fail. For studio work and recording applications, many engineers prefer active boxes for their superior transparency and flexibility.
Common DI Box Features Explained
The Ground Lift Switch
One feature you’ll notice on most DI boxes is a ground lift switch. This switch disconnects pin 1 (ground) on the output XLR from the input ground. Why would you want to do that? Ground loops.
When your instrument, the DI box, and the mixer all share multiple ground connections, you sometimes get an unwanted hum—usually 50Hz or 60Hz depending on your location. The ground lift switch breaks one of these ground connections, eliminating the hum without affecting the audio signal itself. It’s a simple toggle, but it’s incredibly useful in real-world situations.
The Pad Switch
On active DI boxes especially, the pad switch is invaluable. Some instruments—synthesizers connected to their own amplifier outputs, or mixing console main outputs—produce signals that are simply too hot for a standard microphone input. The pad switch attenuates these signals by typically 20dB, bringing them into the appropriate range. Without this feature, you’d get distortion and clipping that no amount of careful mixing can fix.
Multiple Inputs
Many DI boxes feature both 1/4-inch and XLR inputs. This versatility means you can switch between connecting a guitar and a microphone, or use different input types depending on what’s available. Some units even include parallel connections, allowing you to send one source to multiple destinations simultaneously.
Real-World Applications: Where DI Boxes Shine
Live Music Performance
On stage, DI boxes are absolutely essential. A keyboard player connects their instrument to a DI box, which then sends a balanced signal to the front-of-house mixer while simultaneously sending the signal to a stage monitor mix. The same goes for bass players, acoustic guitarists, and any performer using electronic instruments. The DI box ensures clean, professional signal delivery from stage to mixing console, eliminating ground loops and noise that could ruin the performance.
Home Recording Studios
Even in a bedroom studio setup, a DI box serves important purposes. When recording a synth or keyboard directly to your interface, a quality DI box can eliminate interference and ensure the signal is properly matched to your interface’s microphone input. This can make the difference between a recording that sounds amateurish and one that sounds professional.
Podcast and Streaming Production
Podcasters and streamers often use DI boxes to handle multiple audio sources. A guest arriving with their own microphone needs their signal converted to a balanced format that matches the mixer. A video game console outputting unbalanced audio needs a DI box to integrate cleanly into the production. These applications highlight how DI boxes solve practical, real-world problems.
Studio Mixing and Mastering
Professional studios often use DI boxes during tracking sessions when recording instruments like drums or acoustic guitars with multiple microphones. They’re also used when sending mixes to mastering studios—the mastering engineer’s equipment might need a balanced signal from your interface, and a DI box provides exactly that transformation.
Choosing the Right DI Box for Your Needs
Budget Considerations
DI boxes range from budget-friendly options around fifty dollars to high-end professional models costing several hundred dollars. A fifty-dollar passive DI box from a reputable manufacturer will serve most people perfectly well for live sound applications. If you’re doing professional studio recording or need superior sound quality, investing in a hundred to two-hundred-dollar active DI box is worthwhile.
Passive vs. Active Decision
Ask yourself: Will I primarily use this for live sound or studio recording? Live venues typically favor passive boxes for their reliability and simplicity. Studio engineers often prefer active boxes for their flexibility and superior frequency response. If you need to choose just one, an active box gives you more versatility, though it requires more careful power management.
Number of Channels
Single-channel DI boxes are the most common and usually the best choice unless you’re regularly working with multiple simultaneous signals. Stereo or dual-channel DI boxes exist but are less common and more expensive. A single quality DI box is more useful than a mediocre multi-channel unit.
Feature Set
Look for units with ground lift switches—this is practically essential. Pad switches are valuable if you’ll be working with hot signals. Parallel outputs (where your input signal appears on both XLR and sometimes 1/4-inch outputs) add flexibility. LED level indicators help you monitor signal strength in real time.
Installation and Practical Tips
Proper Cable Connections
Always use quality cables. Your DI box is only as good as the cables connected to it. A cheap, noisy instrument cable or XLR cable will undermine everything the DI box does. Invest in cables from reputable manufacturers and replace them if they develop shorts or damage.
Ground Loop Troubleshooting
If you’re hearing a hum through your DI box connection, try these steps in order: First, flip the ground lift switch. If that doesn’t work, verify that your mixer is properly grounded. Finally, check that all your cables are in good condition. Most ground loop problems resolve themselves with the ground lift switch, but sometimes ground lift switch position depends on your specific setup.
Gain Staging
Proper gain staging is crucial when using a DI box. You want your input signal to the DI box to be strong but not so strong that it clips. For active boxes, watch the input level indicator and aim to keep peaks hitting around 0dB. For passive boxes, your source level matters less because there’s no electronics to clip, but you still want a clean, healthy signal feeding into your mixer’s microphone input.
Common Mistakes to Avoid
Using the Wrong DI Box for Your Application
Don’t use a cheap passive box when you need the flexibility of an active box, and don’t overpay for features you won’t use. Match the tool to the job.
Ignoring Cable Quality
A thousand-dollar microphone through a ten-dollar cable sounds worse than a hundred-dollar microphone through a fifty-dollar cable. The DI box sits right in this critical signal path, so everything connected to it matters.
Neglecting Power Management
If you use an active DI box with batteries, replace them regularly. Nothing ruins a gig like a dead battery at the crucial moment. Consider boxes with phantom power options for live situations where you can rely on your mixer to provide power.
The Evolution of DI Box Technology
DI boxes have been around for decades, and while the basic principles remain unchanged, the quality and sophistication have improved dramatically. Modern DI boxes incorporate better transformers, more refined electronic circuits, and more intelligent design. Some newer units include USB connections, allowing them to function as both traditional DI boxes and audio interfaces. However, the core functionality—converting unbalanced signals to balanced signals and matching impedance—remains the fundamental purpose these devices have served since they were first invented.
Investment in Audio Quality
Many people don’t realize that a modest investment in a quality DI box often pays dividends that far exceed the initial cost. A two-hundred-dollar active DI box can improve your overall audio quality by an amount that might otherwise require spending thousands on other equipment. It’s one of those situations where a small investment in the right tool yields outsized returns in sound quality and professional reliability.
Conclusion
A DI box might seem like a simple device, but it solves fundamental problems in audio signal routing that have challenged sound engineers for generations. By converting unbalanced, high-impedance signals into balanced, low-impedance signals, DI boxes enable clean, noise-free audio transmission from instruments and sources directly into professional mixing equipment. Whether you’re running a live sound system for a band, setting up a home recording studio, or streaming content online, understanding how a DI box works and when to use one will dramatically improve your audio quality.
The choice between passive and active models, the importance of ground lift switches, and the practical considerations of cable quality and gain staging all matter when implementing DI boxes in your audio setup. Start with a quality passive unit if you’re unsure, and upgrade to an active box as your needs and expertise grow. Either way, you’ll find that this small device becomes an indispensable part of your audio toolkit. Once you understand what a DI box does and why it matters, you’ll never look at audio signal routing the same way again.
Frequently Asked Questions
Can I use a DI box with any instrument?
A DI box works best with electronic instruments and line-level sources like keyboards, synthesizers, acoustic guitar pickups, and audio interfaces. Microphones typically don’t need DI boxes since they already produce low-level signals suited for microphone inputs. However, you can use a DI box with a microphone if you need to convert its signal to a different format or extend it over long distances.
Do I need phantom power for my DI box to work?
Only if you’re using an active DI box that relies on phantom power. Passive DI boxes require no power at all—they work through transformer coupling alone. If you’re unsure whether your box is active or passive, check the manufacturer’s specifications. Many active boxes also support battery power as a backup option.