How to Wire an Auxiliary Fuse Box in a 12 Volt System: A Comprehensive DIY Guide

Have you ever found yourself staring at your vehicle’s electrical system, wondering how you’d ever fit another accessory into that cramped factory fuse box? You’re not alone. As we add more and more electronic gadgets to our vehicles—from dashcams to auxiliary lighting to marine equipment—the factory fuse box often becomes a bottleneck. That’s where an auxiliary fuse box comes in, and honestly, setting one up isn’t as intimidating as it might seem at first glance.
In this guide, I’m going to walk you through everything you need to know about wiring an auxiliary fuse box in a 12-volt system. Whether you’re working on a truck, a boat, an RV, or any other vehicle running on 12 volts, this information will help you expand your electrical capacity safely and efficiently.
Understanding Your 12-Volt Auxiliary Fuse Box
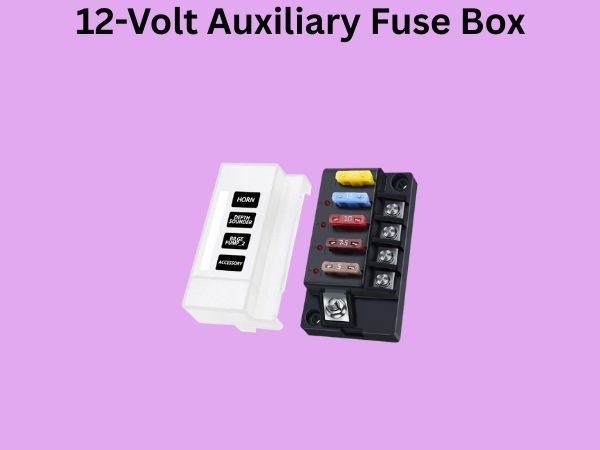
Let me start by explaining what an auxiliary fuse box actually does. Think of it like adding an extra panel to your home’s circuit breaker—it gives you more capacity and better organization. An auxiliary fuse box is essentially a secondary distribution center that takes power from your vehicle’s battery and allows you to create multiple protected circuits for various accessories.
The beauty of this setup is that you’re not relying on your vehicle’s original electrical system, which was designed for factory equipment only. Instead, you’re building a dedicated infrastructure for your custom additions. This means you won’t accidentally overload the factory system, which could damage your vehicle’s computer or cause electrical fires.
Why You Need an Auxiliary Fuse Box
When you add multiple electrical accessories to your vehicle, you’re essentially asking the factory wiring to do more than it was designed to handle. The factory fuse box has a limited number of slots, and more importantly, it has a total amperage capacity that can’t be exceeded. An auxiliary fuse box solves this problem by providing its own dedicated power source directly from the battery, complete with its own protective fusing.
Tools and Materials You’ll Need
Before you even think about touching a wire, let’s talk about what you need to gather. Having everything on hand before you start will save you countless trips to the parts store.
Essential Tools
- Wire strippers (18 to 2 AWG range recommended)
- Crimpers for terminal connectors
- Wire cutters
- Screwdrivers (both Phillips and flat head)
- Adjustable wrench or socket set
- Multimeter for testing
- Heat shrink tubing or electrical tape
- Flashlight or headlamp
- Safety glasses and gloves
- Battery terminal puller (optional but helpful)
Materials You’ll Purchase
- Auxiliary fuse box kit (choose based on your needs—typically 4, 6, or 8 circuits)
- Battery cable (appropriate gauge for your main power line)
- Inline fuse holder with appropriately rated fuse
- Ground cable (matching your battery cable gauge)
- Circuit-specific wiring (gauge depends on amperage requirements)
- Fuses for each circuit (appropriate amperage ratings)
- Crimp connectors and terminal lugs
- Relays (if needed for high-draw accessories)
Critical Safety Considerations Before You Begin
I can’t stress this enough: electrical work on vehicles can be dangerous if done improperly. Let’s talk safety first, because I’d rather you be bored by my caution than injured by carelessness.
Disconnecting Your Battery
Always, and I mean always, disconnect the negative terminal of your battery before starting any electrical work. This is your first line of defense against accidental short circuits. Unscrew the negative terminal clamp and pull it away from the battery post. Some people like to wrap it with tape to prevent accidental reconnection while they’re working.
Understanding Amperage and Heat
Here’s something that really matters: an undersized wire carrying too much current will heat up like a stovetop coil. This heat can melt the insulation, cause fires, and potentially destroy your vehicle. We’ll talk more about wire gauges later, but just know that using the correct wire gauge for your amperage is absolutely non-negotiable.
Protecting Against Short Circuits
A short circuit is basically what happens when electricity finds an unintended path back to ground. In a vehicle, this can be catastrophic. Always use appropriate fusing, always insulate exposed connections, and always double-check your work before powering anything up.
Choosing the Right Location for Your Auxiliary Fuse Box
Location matters more than you might think. You need to find a spot that’s accessible for future troubleshooting but also protected from the elements and potential damage.
Ideal Mounting Locations
In a vehicle, consider mounting your auxiliary fuse box in the engine bay near the battery, inside the cab under the dashboard, or in a truck bed utility box. The engine bay is often the most practical because your main power line doesn’t need to travel as far. However, you need to ensure the location is protected from moisture and extreme heat.
In an RV or boat, interior locations are often preferred since engine bay space is precious. Under a seat or inside a cabinet works well, as long as there’s adequate ventilation and the box won’t be exposed to water.
Considerations for Placement
- Accessibility for maintenance and troubleshooting
- Protection from water, dirt, and extreme temperatures
- Adequate space around the box for heat dissipation
- Distance from moving parts or high-traffic areas
- Proximity to components it will be powering
Understanding Fuse Ratings and Wire Gauges
This section is crucial because this is where most DIY electrical mistakes happen. People either choose wire that’s too small or fuse ratings that don’t match their wire, and that’s when bad things occur.
Wire Gauge Fundamentals
Wire gauge is measured in AWG (American Wire Gauge), and here’s the counterintuitive part: higher numbers mean thinner wires. So 10 AWG is thicker than 12 AWG, which is thicker than 14 AWG. For a 12-volt system, here’s a general guideline for maximum amperage per wire gauge at various distances:
- 4 AWG: 70 amps at 7 feet
- 6 AWG: 50 amps at 7 feet
- 8 AWG: 40 amps at 7 feet
- 10 AWG: 30 amps at 7 feet
- 12 AWG: 20 amps at 7 feet
- 14 AWG: 15 amps at 7 feet
The key is matching your wire gauge to both the amperage your circuit will draw and the distance the wire must travel. Longer runs require thicker wire because of voltage drop.
Fuse Rating Selection
Your fuse rating should match the wire gauge you’re using. The fuse protects the wire, not the accessory. If you have 10 AWG wire rated for 30 amps, your fuse should be 30 amps. This way, if something goes wrong and excessive current flows, the fuse will blow before your wire overheats.
Running the Main Power Line from Battery to Fuse Box
This is the backbone of your system, and it deserves careful attention. The main power line carries all the current that will eventually be distributed through your auxiliary fuse box.
Selecting Your Main Power Cable
Most auxiliary fuse boxes can handle between 100 and 150 amps on the main line. For safety, I’d recommend using 4 AWG cable for the main run. This gives you plenty of overhead and ensures you won’t have voltage drop issues.
Installation Steps for Main Power
First, disconnect your negative battery terminal. Then, loosen the positive battery terminal clamp and install your battery cable. Use a quality connector designed specifically for battery applications—crimp it securely and consider using solder as well for extra security.
Route your main power cable from the battery to your auxiliary fuse box location, keeping it away from moving parts like the serpentine belt. You might want to use wire loom or conduit to protect the cable and keep things looking clean. Avoid running the positive cable alongside other cables unless absolutely necessary.
Installation at the Fuse Box End
At the fuse box, connect the main power cable to the input terminal. Most auxiliary fuse boxes have clearly marked input and ground terminals. Ensure your connection is tight and corrosion-free. Some people apply a thin layer of dielectric grease to prevent future corrosion.
Installing a Master Disconnect Switch
Here’s something that separates a professional installation from an amateur one: a master disconnect switch. This switch sits between your battery and your fuse box, allowing you to completely isolate your auxiliary system when the vehicle isn’t in use.
Why You Need a Disconnect Switch
Think of the disconnect switch as a circuit breaker for your entire auxiliary system. Not only does it prevent battery drain when your vehicle is sitting unused, but it also provides a safety feature during emergencies or maintenance work. If something starts smoking, you can flip this switch and immediately cut power to the whole system.
Choosing and Installing the Right Switch
Select a disconnect switch rated for at least 150 amps continuous. Install it as close to the battery as possible, ideally within 18 inches. The switch should be mounted in an accessible location where you can reach it easily.
Run your battery cable to the switch input, then run another cable from the switch output to your auxiliary fuse box. Make sure the switch has a clear on and off position, and consider using a switch with a battery terminal design for the easiest installation.
Grounding Your Auxiliary Fuse Box
If the positive cable is the highway that electricity travels on, then the ground cable is the return road. Without a proper ground, your system simply won’t work, and you might damage components in the process.
Understanding Ground Return Paths
In a vehicle, most components use the vehicle frame or body as a ground return. However, for an auxiliary fuse box, you need a dedicated ground cable running directly from the fuse box to the vehicle’s battery negative terminal or a solid ground point on the frame.
Installing Your Ground Cable
Use the same gauge cable for your ground as you did for your main power line. Run it from the negative input terminal of your auxiliary fuse box to either the negative battery terminal or a solid ground point on the vehicle’s chassis. The ground point should be clean, unpainted metal for maximum conductivity.
If you’re using a frame ground point instead of the battery, make sure it’s mechanically sound. I’ve seen too many people grind through paint and immediately start getting corrosion. Use a quality star washer under your lug connector to bite through any remaining oxidation and maintain good contact.
Connecting Individual Circuits to Your Accessories
Now that the backbone is in place, let’s talk about branching out to individual accessories. This is where your auxiliary fuse box truly shines, giving you multiple protected circuits.
Planning Your Circuits
Before you start connecting anything, map out what you’re going to power. List each accessory and its approximate amperage draw. You can usually find this information in the accessory’s manual or on its specification sheet. Group related accessories on the same circuit if the total amperage doesn’t exceed your fuse rating.
Circuit Wiring Process
For each circuit, select the appropriate wire gauge based on the amperage and distance. Run the wire from the fuse box output terminal to your accessory. Install an appropriate fuse in the fuse box slot—this fuse should be rated for the wire gauge you’re using, not the accessory’s maximum draw.
At the accessory end, connect your positive wire securely. Then run a ground wire from the accessory back to a solid ground point. Some people like to bring all grounds back to the auxiliary fuse box ground terminal, while others connect them directly to the vehicle frame. Either approach works, but consistency is important.
Using Relays for High-Draw Accessories
For accessories that draw significant current—like auxiliary lighting systems or winches—consider using relays. A relay allows a small control wire from your fuse box to trigger a heavy-duty switch elsewhere in the vehicle. This keeps your fuse box terminals from overheating and extends their lifespan.
Testing and Troubleshooting Your Installation
Before you call your installation complete, you need to thoroughly test everything. This is where your multimeter becomes your best friend.
Pre-Power-Up Checks
With everything connected but the battery still disconnected, visually inspect all connections. Look for any exposed copper, loose terminals, or wires rubbing against sharp edges. Use your multimeter in continuity mode to verify that your ground connections are solid.
Initial Power-On Testing
Reconnect your negative battery terminal and turn on your master disconnect switch. Check for any burning smells, sparks, or excessive heat. Use your multimeter to verify voltage at the fuse box terminals—you should read close to 12 volts on the positive side and 0 volts on the ground side.
Testing Individual Circuits
Turn on each accessory one at a time. Verify that it’s receiving proper voltage and that it functions correctly. Use your multimeter to check voltage drop across the wire run—excessive voltage drop indicates undersized wire. At the accessory, you should read at least 11 volts for most 12-volt equipment.
Load Testing
If possible, run all your accessories simultaneously and verify that everything still operates correctly. Monitor your battery voltage—it might drop slightly under heavy load, but it shouldn’t go below 10 volts. If it does, you likely have insufficient battery capacity or undersized main power wiring.
Common Mistakes to Avoid
Let me share some of the most frequent errors I see